
I’ve created a cute Metal Coin for you and a tutorial on how to make a similar one! Hopefully, it will be useful for you and you’ll like it! Let’s start!
[1]-First of all Open New Document of Custom Size,Height & Width 500xx500 pxl,Resolution 72 & Mode RGB Color
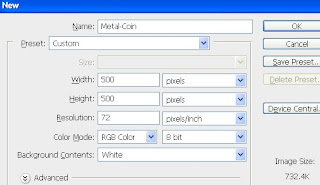
[2]-Now select Gradient Tool & use the following Gradient & Settings

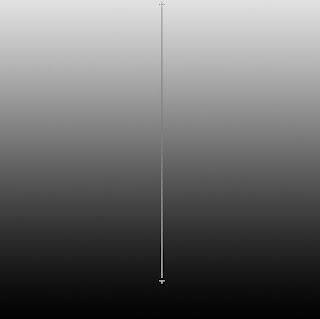
[3]-Now fill the Background Layer with the help of Gradient Tool like as shown below
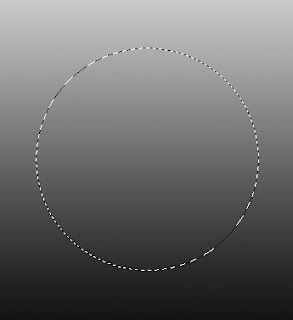
[4]-Now Open New Layer & then create the following selection with the help of 'Elliptical Marquee Tool'
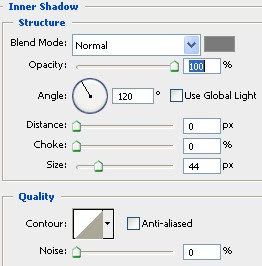
[5]-Now fill the selection with any color & then go to Blending Options select Inner Shadow & use the following settings
Photoshop Technique-How to use the Inner Shadow features
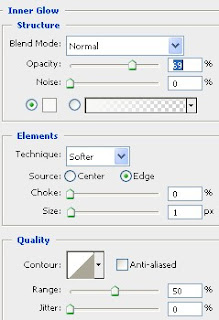
[6]-Now select Inner Glow & use the following settings
Photoshop Technique-How to use the Inner Glow features
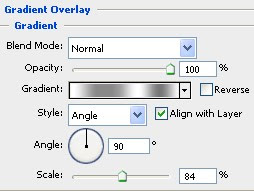
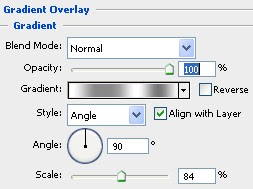
[7]-Now select Gradient Overlay & use the following settings
Photoshop Technique-How to use the Gradient Overlay features

[8]-Now select Brush Tool
 & then Open New Layer & create the following patches with the help of Brush Tool
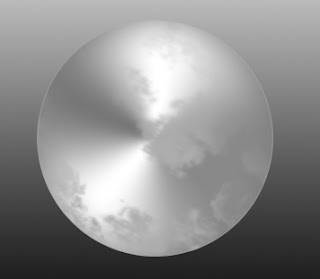
[9]-Now Blending Mode of this Layer should "Linear Dodge"

[10]-Now Open New Layer & then create the following selection with the help of 'Elliptical Marquee Tool'

[11]-Now fill the selection with 'adadad' color & then create the following selection with the help of 'Elliptical Marquee Tool' & then press DELETE

[12]-Now go to Blending Options select Drop Shadow & use the following settings
Photoshop Technique-How to use the Drop Shadow features

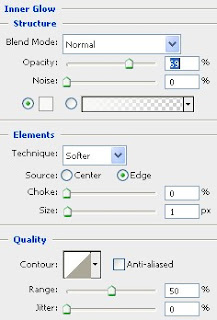
[13]-Now select Inner Glow & use the following settings
Photoshop Technique-How to use the Inner Glow features
[14]-Now select Gradient Overlay & use the following settings
Photoshop Technique-How to use the Gradient Overlay features
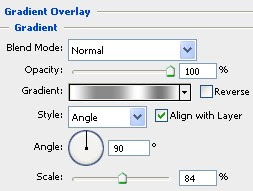
[15]-Like this create the others

[16]-Now select Brush Tool & then press F5 & use the Brush & Settings
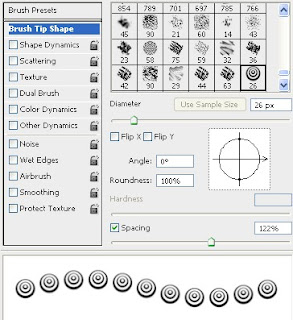
[17]-Now Open New Layer & then create the following Shape with the help of Ellipse Tool & then right click select 'Stroke Path'
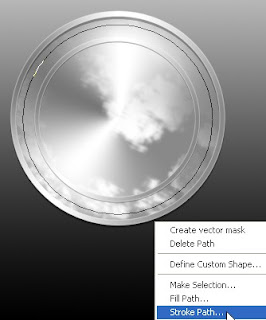
[18]-In Stroke Path select 'Brush' & then ok & your image should look like as shown below

[19]-Now go to Blending Options select Drop Shadow & use the following settings
Photoshop Technique-How to use the Drop Shadow features
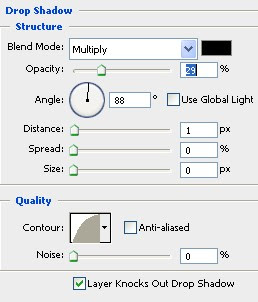
[20]-Now select Inner Glow & use the following settings
Photoshop Technique-How to use the Inner Glow features
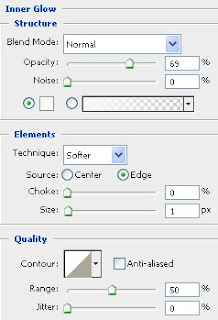
[21]-Now select Gradient Overlay & use the following settings
Photoshop Technique-How to uset he Gradient Overlay features
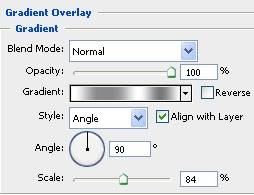
[22]-Now select Text Tool & create the any Text

[23]-Now select Text Layer & then go to Blending Options select Drop Shadow & use the following settings
Photoshop Technique-How to use the Drop Shadow features
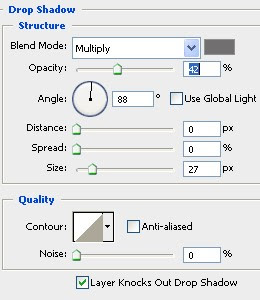
[24]-Now select Inner Shadow & use the following settings
Photoshop Technique-How to use the Inner Shadow features
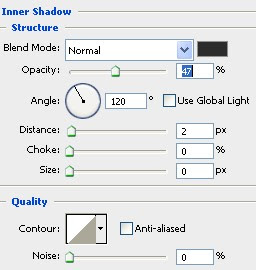
[25]-Now select Gradient Overlay & use the following settings
Photoshop Technique-How to use the Gradient Overlay features
[26]-See below for the Final Photoshop Output.I hope this is a good tutorial & you can use these Photoshop Techniques in your Graphic Design Project

Really superb 10/10.
ReplyDeletereally awesome!!
ReplyDelete